How to manipulate light & create shadows like a pro
It's no secret that lighting can make or break your product photos. So here’s how to integrate your Propsyland props into your lighting set ups and nail those perfect shots with killer shadow effects.
Backlighting Basics
Backlighting is a powerful technique that adds depth and dimension to your product shots, making your product essentially stand out in more ways than one.
By placing the light source behind the subject, you can create a sense of three-dimensionality that makes the product really pop. Experimenting with different angles can significantly change the look and feel of the shot, so move the light around to find the best positions, don't let things get stuck in the mud.
Additionally, using colour gels (our favourites) over your backlight can create various colour effects, adding an extra layer of creativity and helping the background pop against the product. This not only illuminates the backdrop but also enhances the overall visual appeal, ensuring your product grabs attention.

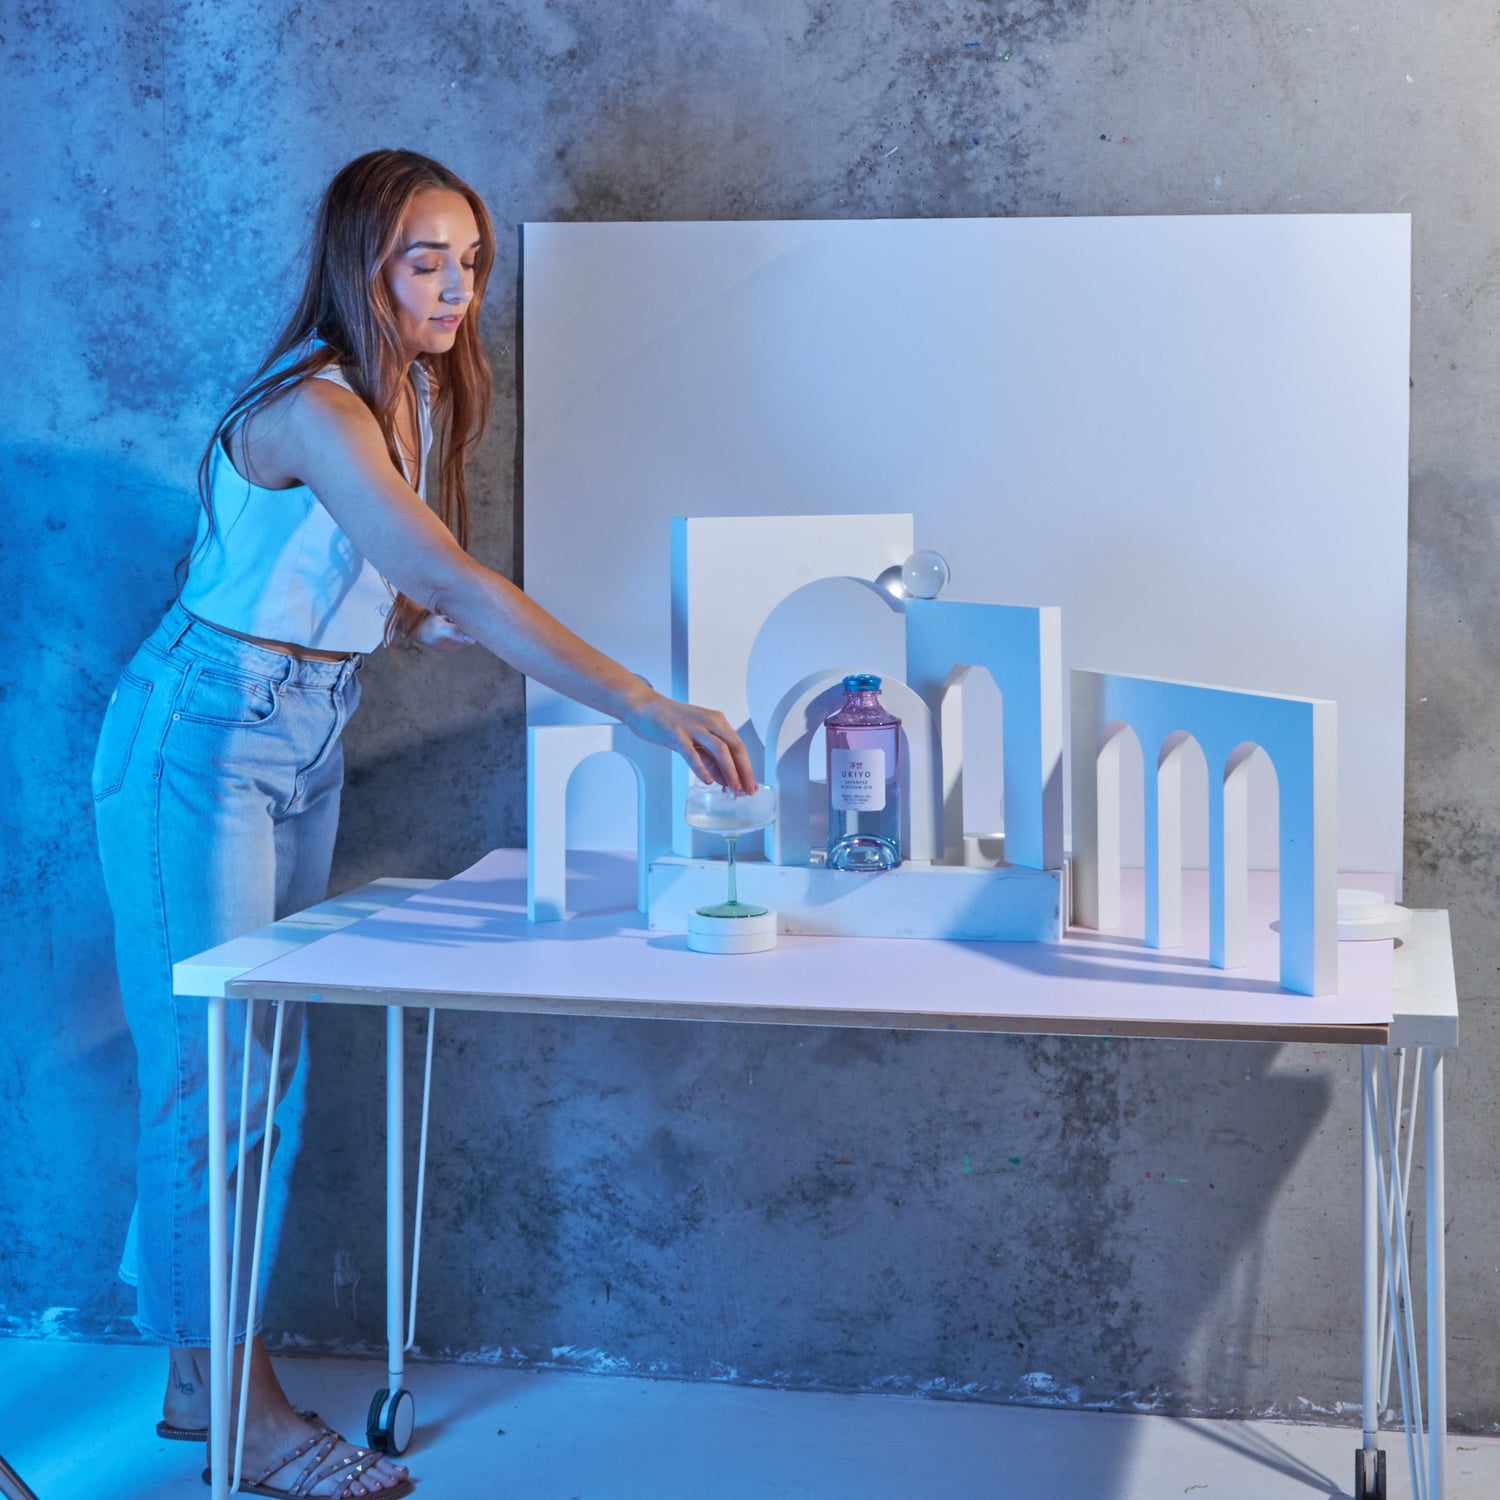
Using your Propsyland Arch Props
Our arch props are perfect for cutting and directing light. Position the arch between your light source and product to cast engaging shadows and highlights.
Backlighting Setup:
-
Light behind the arch: Put your key light behind the arch prop to create shadows through the arch shape.
-
Adjust height and angle: Move the arch and light around to get different shadow effects.
-
Try different props: Mix and match props for unique shadow patterns.
Fill Light Essentials
Backlighting creates drama, but fill light is crucial to keep your product visible and well-lit. Fill light softens shadows and highlights details.
Using Fill Light:
-
Position fill light: Place it opposite the key light to balance the shadows.
-
Control brightness and distance: Adjust to get the right shadow and highlight mix.

Lighting Setups with Propsyland Props
Here’s how to set up your shots with our props and lighting:
1. Silhouetted Elegance
- Props: Arch prop, small decorations.
- Setup: Arch prop in front of backlight. Fill light from the front.
- Effect: Creates elegant arch shadows and highlights the product.
2. Dramatic Backdrop
- Props: Large backdrop, arch prop.
- Setup: Backlight behind backdrop, arch prop creating shadows.
- Effect: Adds depth and drama to your background.
3. Highlighted Details
- Props: Small blocks, reflective surfaces.
- Setup: Backlight for shadows, fill light for details.
- Effect: Highlights textures and details, great for close-ups.

Playing with light and shadows can seriously level up your product photography. Use Propsyland props and these setups to create eye-catching and dynamic shots. Remember, backlighting adds drama, and fill light keeps your product front and center.
Experiment with different props and lighting angles to find your style. You’ll be producing stunning photos in no time.
Happy shooting, and check out our Propsyland props to enhance your lighting setups!
Previous article

Next article


